
TO create a ZTABLE, The steps are as follows:
- Go to SE11 Transaction.
- Enter the table name and press Create.

- Enter the description, Delivery class and check on table maintenance allowed. Then click on the tab Fields.

- Enter the ZCHAR in fields tab and ZCHAR_DE in field type tab.

- Double click on ZCHAR_DE. Then it will ask for Save. Press ‘YES”.

- Save it as a local object on pressing Local object button.

- Now it will ask for the creation of the data element. Press Yes.

- Click on the Field label tab and enter the lengths and descriptions accordingly.

- Then press Definition tab and enter the domain.

- Double click on that zchar_d to create domain, then it will ask for save before going next screen.
- Save it as a local object.

- Now it will ask for domain creation. Press Yes.

- Give short description for that domain which you are creating. And mention the data type in data type field and length in no. characters field an press ENTER.

- Then press Ctrl+F3. It will ask for save before activation. Save it as a local Object.

- Press Enter.
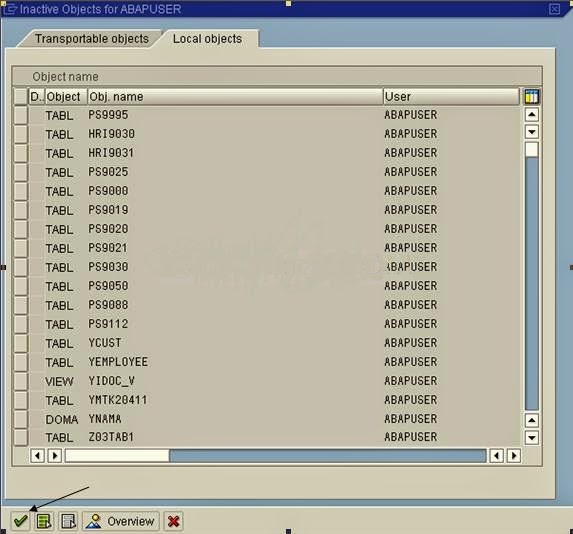
- Then the following screen appears. Press on back button.

- Press Ctrl+F3. You will get the following screen. Press Back button.

- You will get the following screen.

- Create one more field ZNUM and give data element name as ZNUM_DE. And double click on ‘ZNUM_DE’.

- Save it by pressing Yes.

- Now it will ask for the data element creation. Press Yes.

- Give short description of the data element. And give the lengths and field labels accordingly in Field label tab.

- Press on Definition tab and give the domain name in Domain field. Double click on ZNUM_D.

- It will ask for save. Press Yes.

- Save it as a local Object.

- Now it asks for Domain creation. Press Yes.

- Give short description in short text field. Enter the data type and no. characters, Press Enter.
- Save this as a local object.

- Press enter.

- Now you will get the following screen. Press Back button.

- Activate the data element By pressing Activate button or Pressing Ctrl+F3.

- Press enter.

- Press Back button.

- Now we created two fields. And Data elements and Domain for these two fields.
- Give the data class and size category of the table as per the requirement.
- Now activate the table by pressing the activate button or CTRL+F3.

- Press enter.

- Now you will get the following screen.

- Now enter the data into table. Go to Utilitiesà Table contents à Create Entries.

- Now enter the data in the fields and Save it.

- You will get the following screen after clicking the Reset Button.
- Enter the data for the second entry into the table.

- Save it and press reset.

- You will get the following screen.

- Again enter the data for the third entry.
- Press save, Reset (Optional) and Back button.

- Now you will get the following screen.

- To see the table contents go to Utilities à Table contents à Display. Or press Ctrl+Shift+F10.

- You will get the following screen.

- Press on run button or press F8. Now it will display the table contents.

Press Yes.

Then Press on Activate button or Press Ctrl+F3.

Now we have to maintain the technical settings. Press on Technical settings button.

And press the back button.
